

Follow these steps to connect your number through Meta Embedded Signup, starting from the GetGabs app in your Shopify admin. Meta may route an eligible WhatsApp Business App number into Coexistence automatically.
Important – Meta now commonly asks for the phone number near the start of signup. If the number is active in WhatsApp Business App and is eligible for Coexistence, Meta may route it to that setup automatically. Some accounts may show a different screen order.
Before You Start, Make Sure You Have
- Use the Meta/Facebook login that has admin or full-control access to the correct Meta Business Portfolio.
- Keep your business details ready. Use the correct portfolio for the business that will own the WhatsApp Business Account (WABA).
- For a new API-only number, keep the SIM/phone or telephone line available to receive the Meta verification code by SMS or voice call.
- For Coexistence, have the primary phone with the WhatsApp Business App installed and updated. You must be able to approve the connection from that app and complete the QR step if Meta shows it.
- If the number is already connected to another WhatsApp API provider, stop and ask GetGabs support about migration before proceeding. That is different from Coexistence.
First, Understand Which Path You Need
| Path A | Path B |
|---|---|
Fresh / API-only numberUse this for a number you want on the WhatsApp Business Platform only. Meta normally asks you to verify ownership by SMS or voice call. Do not expect the WhatsApp Business App to remain the active app for that same number under the standard API-only route. |
Existing WhatsApp Business App numberUse this when you want the same number to stay active in the WhatsApp Business App and also connect to GetGabs through Cloud API. When Coexistence is enabled and Meta considers the number eligible, Meta can start this path automatically after number entry; there may be no separate “Connect existing app” option. |
Critical wording – on the phone-number screen, “Enter a new phone number” can mean a number that is new to the WhatsApp Business Platform. It does not always mean the number must be unused in the WhatsApp Business App. If you want Coexistence, enter the number that is currently active in the WhatsApp Business App and let Meta assess the number.
Step-by-step: Connect your number
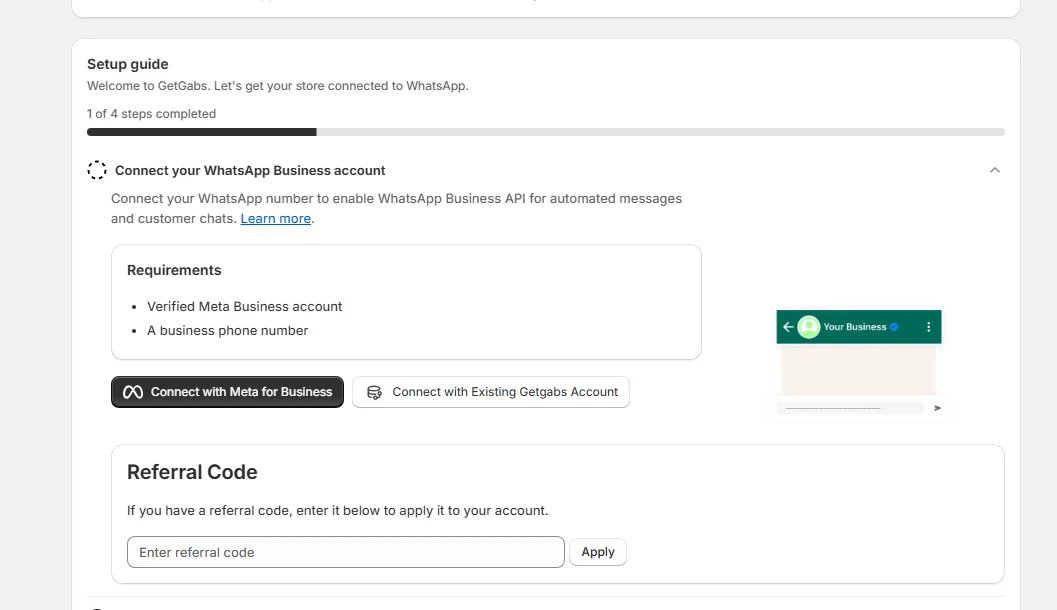
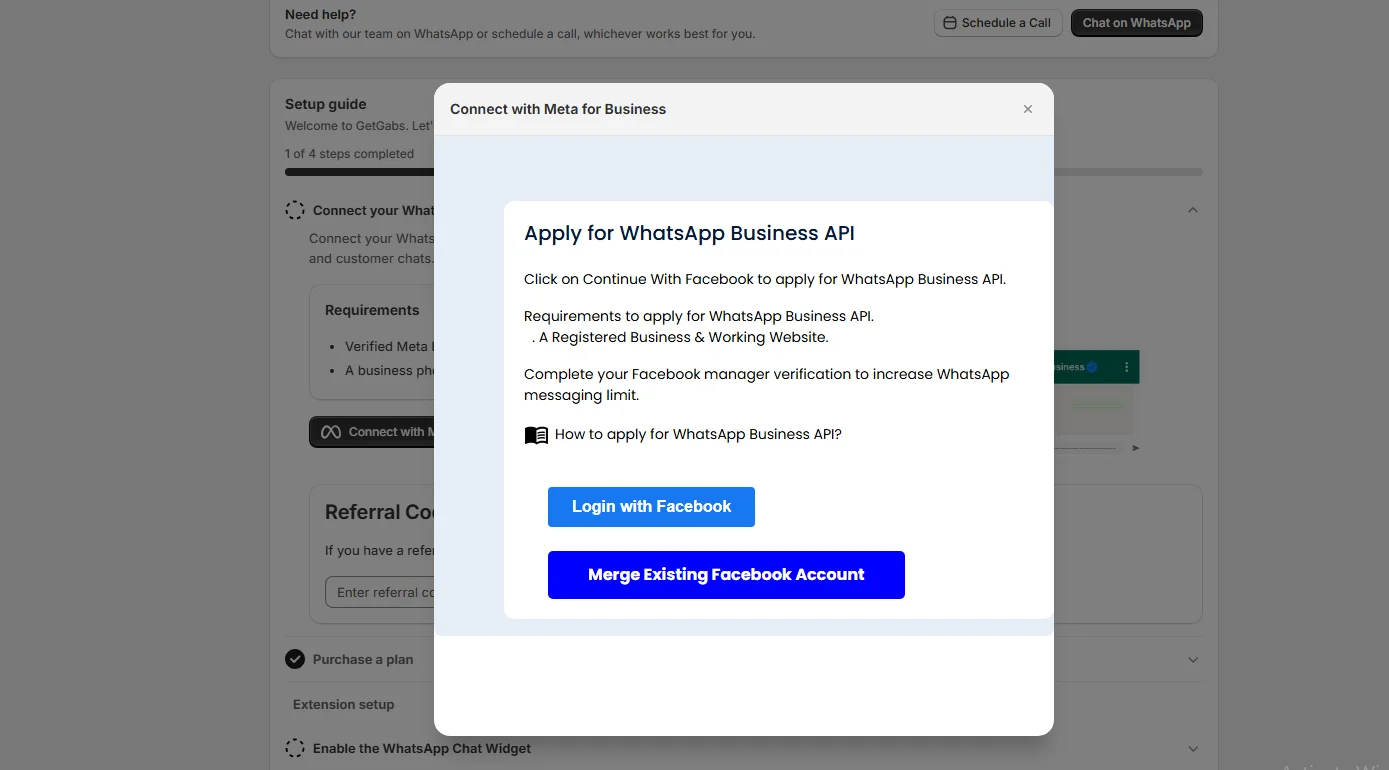
1. Start from your Shopify app: Open the GetGabs app from your Shopify admin. On the onboarding checklist (“Setup guide”), under Connect your WhatsApp Business account, click Connect with Meta for Business.
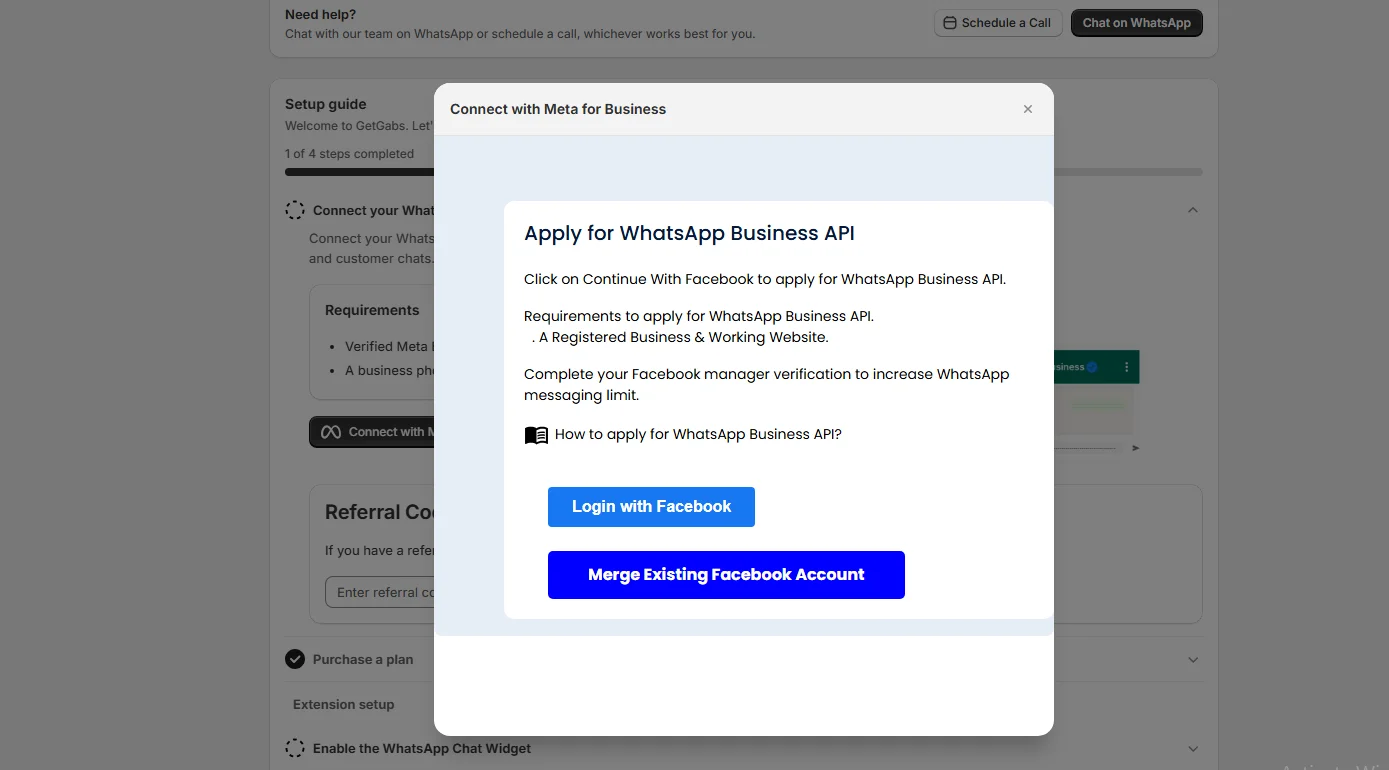
2. Apply for WhatsApp Business API: A GetGabs dialog opens explaining the requirements — a registered business and a working website — and completing Facebook Business Manager verification to increase your WhatsApp messaging limit. Choose Login with Facebook to connect a new Facebook/Meta account, or Merge Existing Facebook Account if you already manage a connected Meta Business. A Meta pop-up should open. Keep the Shopify admin tab open until the flow finishes.
3. Continue and sign in to Meta: Read the onboarding introduction, click Continue, and sign in with the Facebook/Meta profile that manages the correct business portfolio.
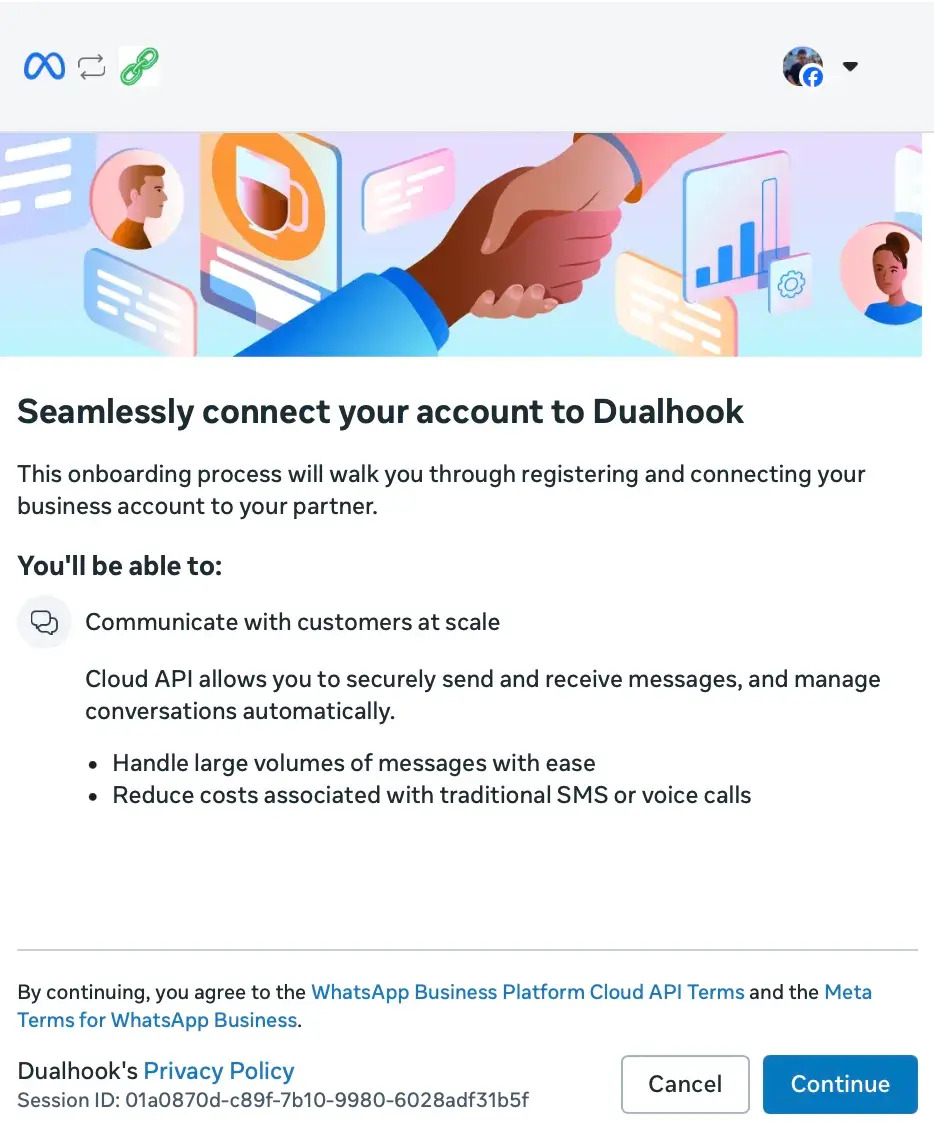
4. Review the authorization screen: Review the information and permissions that the provider’s app requests, then continue. Only approve the connection if you recognise that you started the signup from GetGabs.
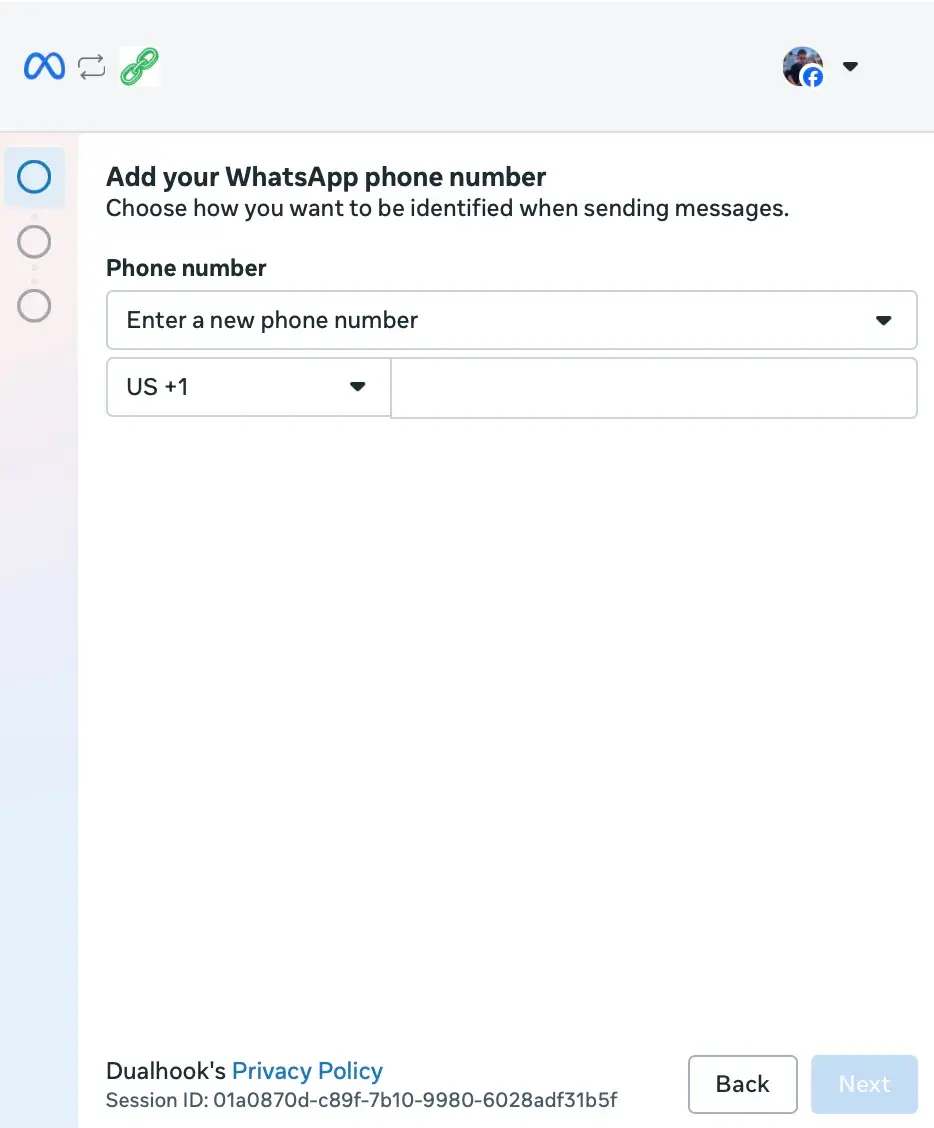
5. Enter the phone number first: On Add your WhatsApp phone number, choose the listed number if the exact number appears with a Registered label. Otherwise, choose Enter a new phone number, select the correct country code, enter the number that you want to connect, and click Next.
Choose the route Meta displays
Meta evaluates the number and the available onboarding configuration. The route is not a manual choice on every version of Embedded Signup.
Path B — If the number is active in the WhatsApp Business App and Coexistence is available
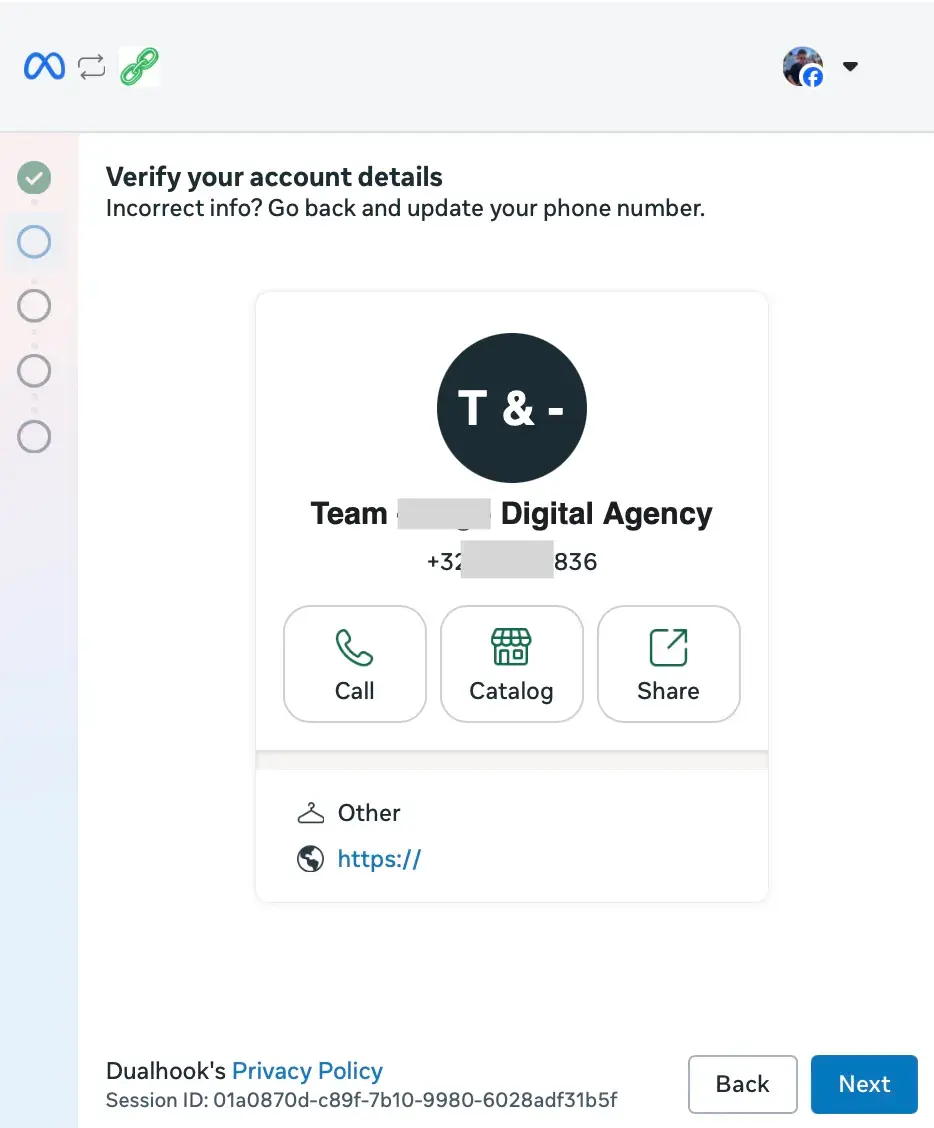
1. Confirm the app business profile: Meta may show the WhatsApp Business App profile, including the business name, profile image, number, category, and website. Verify that this is the correct business number. Click Next.
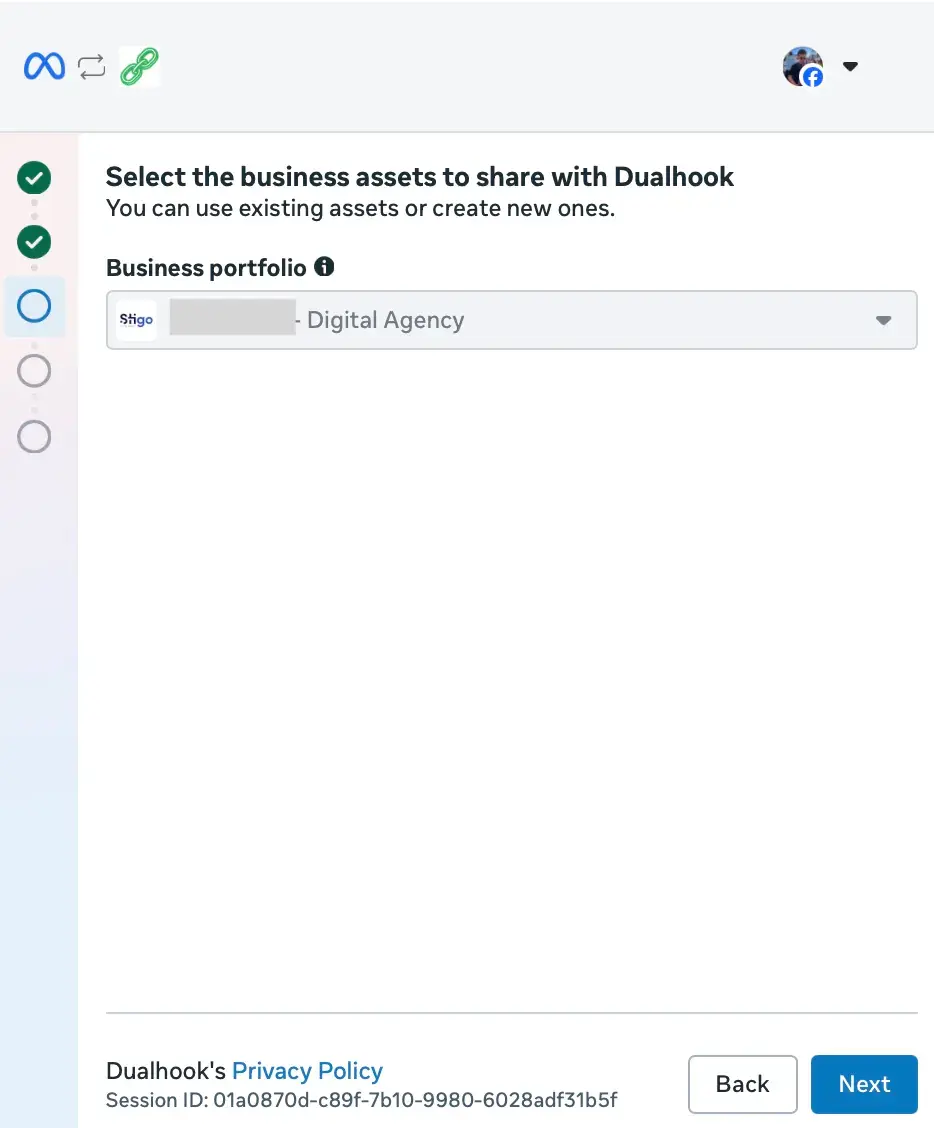
2. Select the business portfolio: Choose the existing Meta Business Portfolio that should own the WABA. If you need to create a new one, enter accurate business details and choose the correct country. Avoid creating a duplicate portfolio just to get past this step.
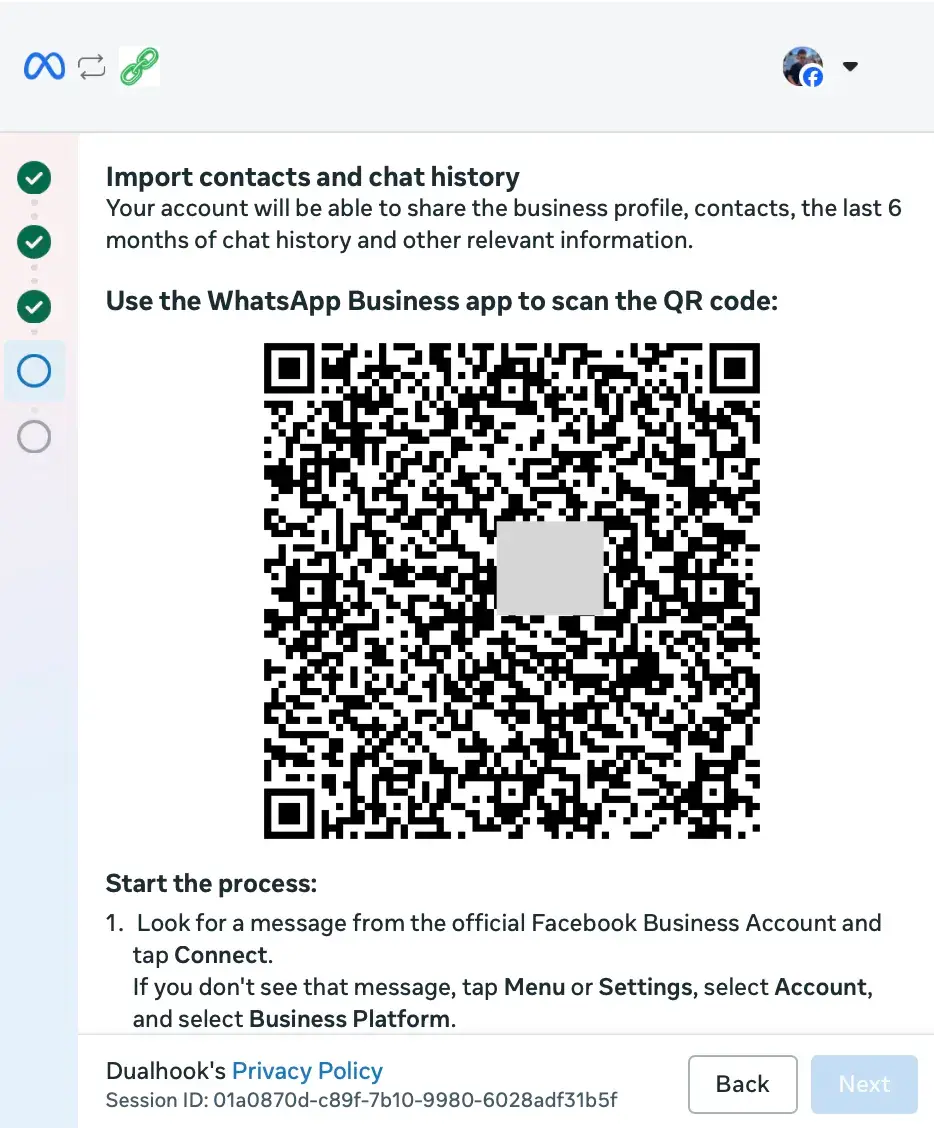
3. Keep the Meta pop-up open and complete the QR connection: Meta may show a QR code for importing the business profile, contacts, and eligible chat history. Take the primary phone that runs the WhatsApp Business App and follow the instructions shown on the screen. Do not close or refresh the Meta pop-up while the phone step is pending.
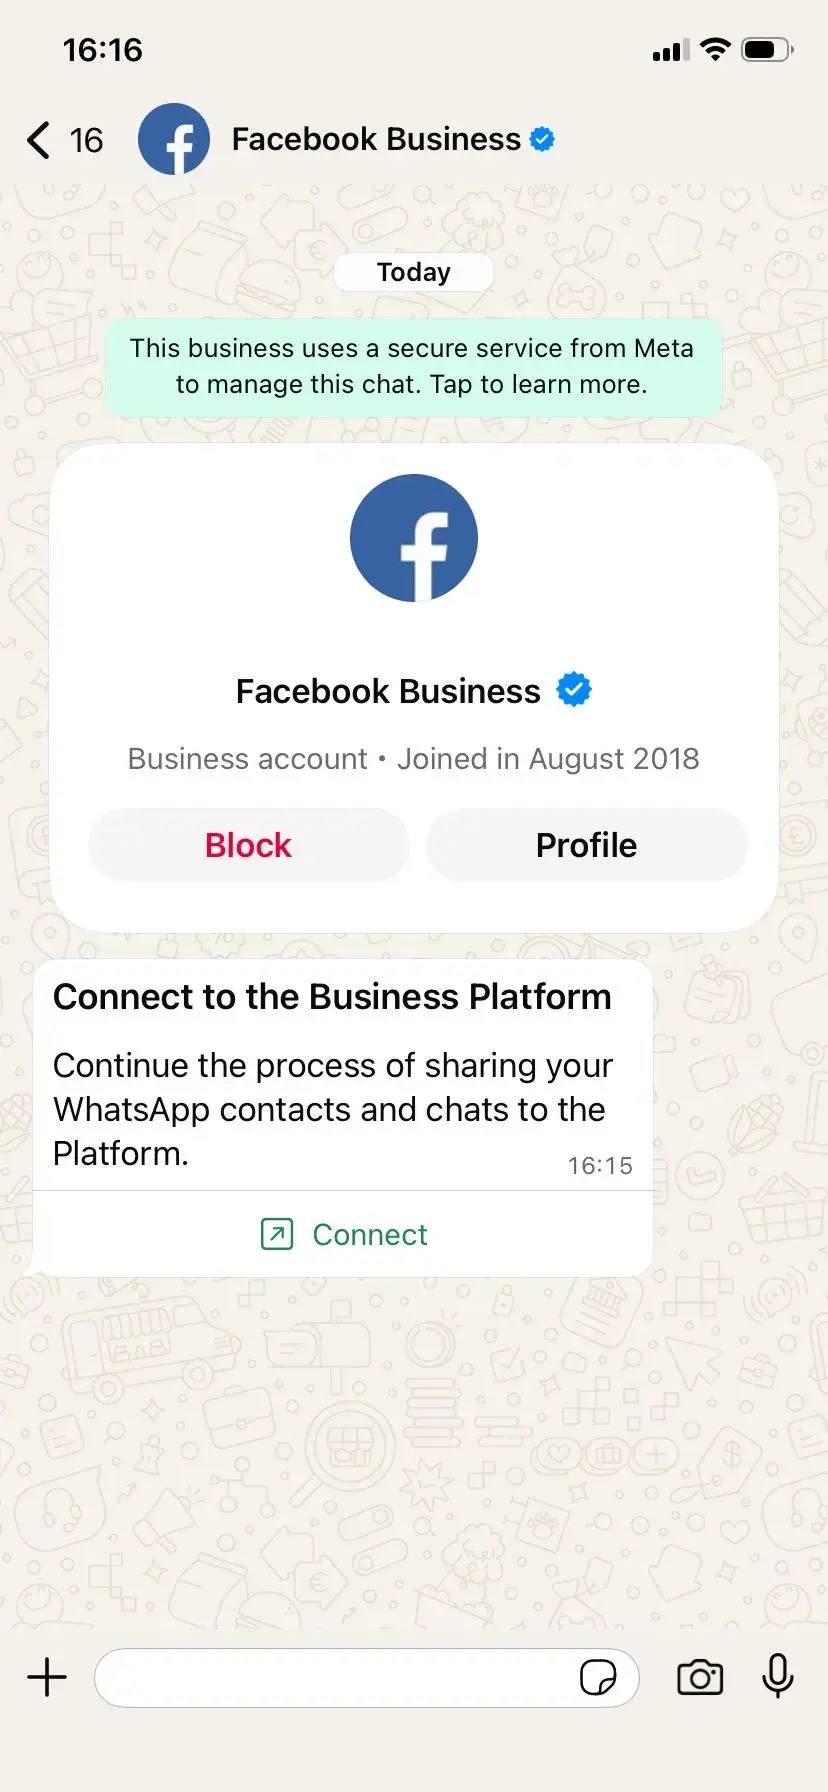
4. Approve the connection in the WhatsApp Business App: Look for a message from the verified Facebook Business account with a Connect action. Tap it and read the explanation. If the prompt is not visible, open the WhatsApp Business App’s Settings/Menu → Account → Business Platform area, if available, then follow the on-screen steps.
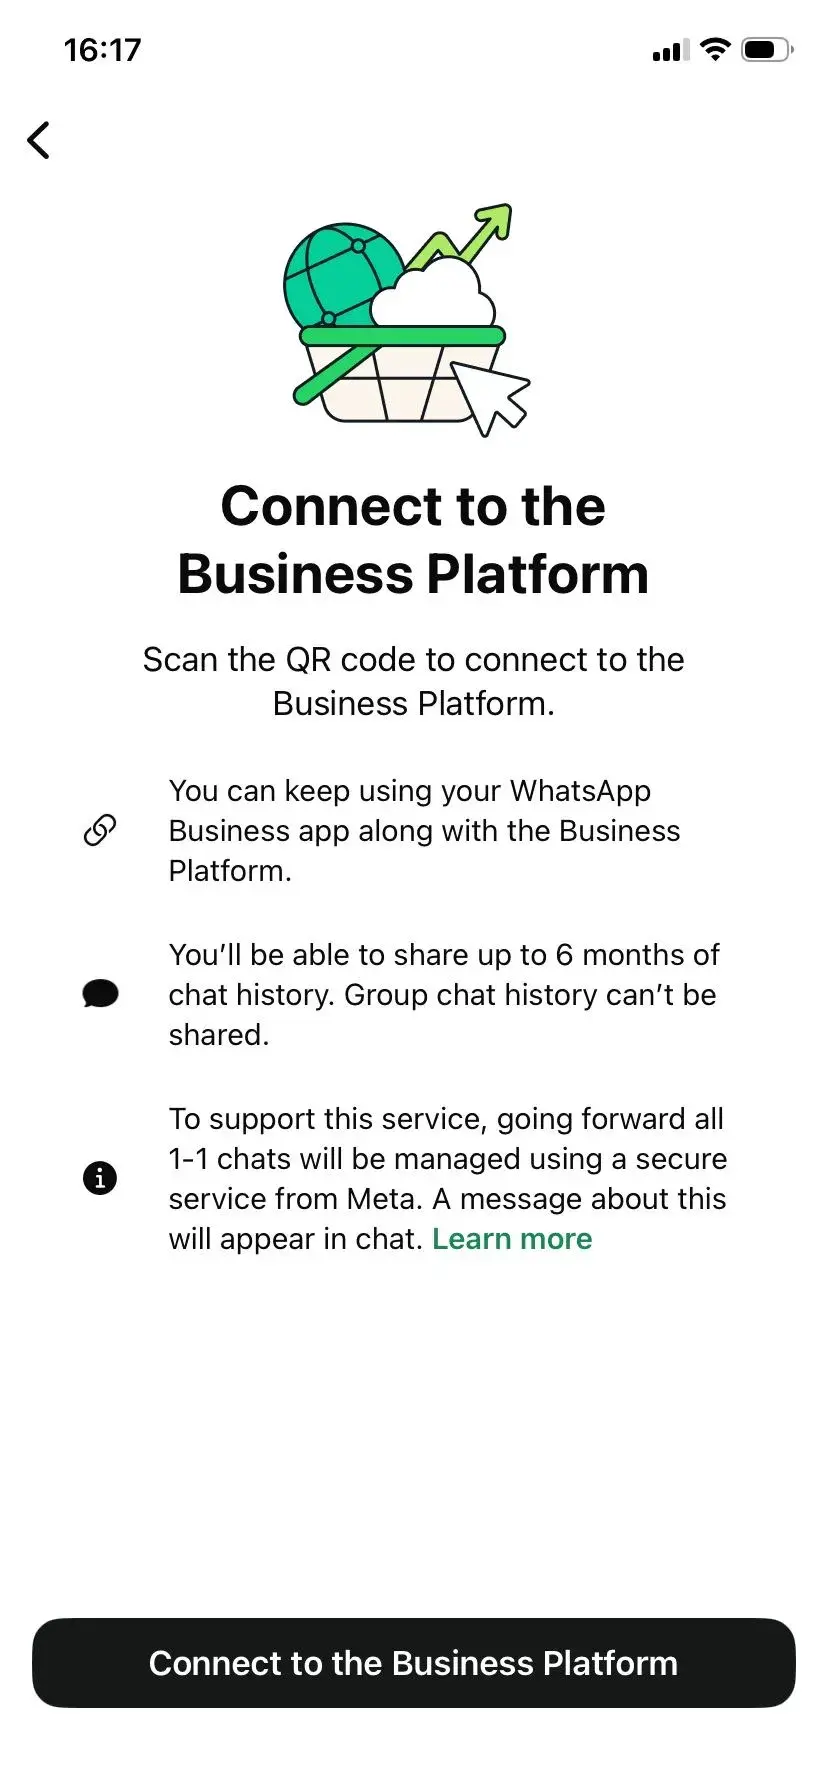
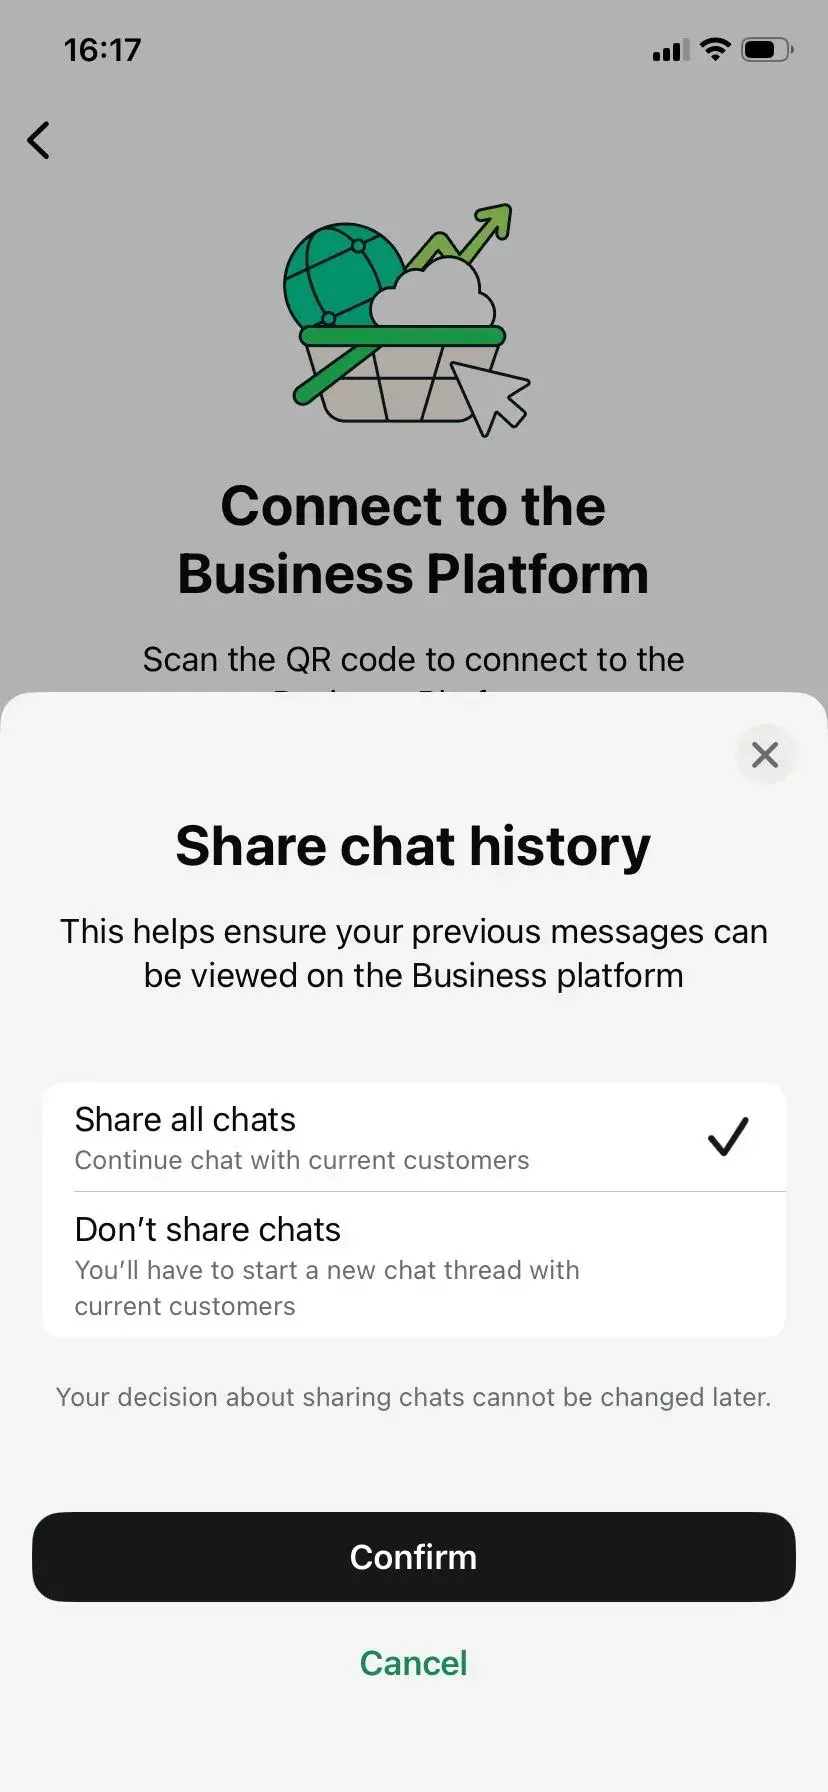
5. Choose whether to share chat history: Select the option that matches the business’s data-sharing preference. The reference flow offers sharing chats or starting fresh threads. Make this choice carefully; it may not be changeable after onboarding. Group-chat history is not included in the described import flow.
6. Return to the desktop popup: Wait for Meta to resume after the phone confirms the connection. If the screen keeps waiting, do not repeatedly restart the process; capture the screen and contact GetGabs support.
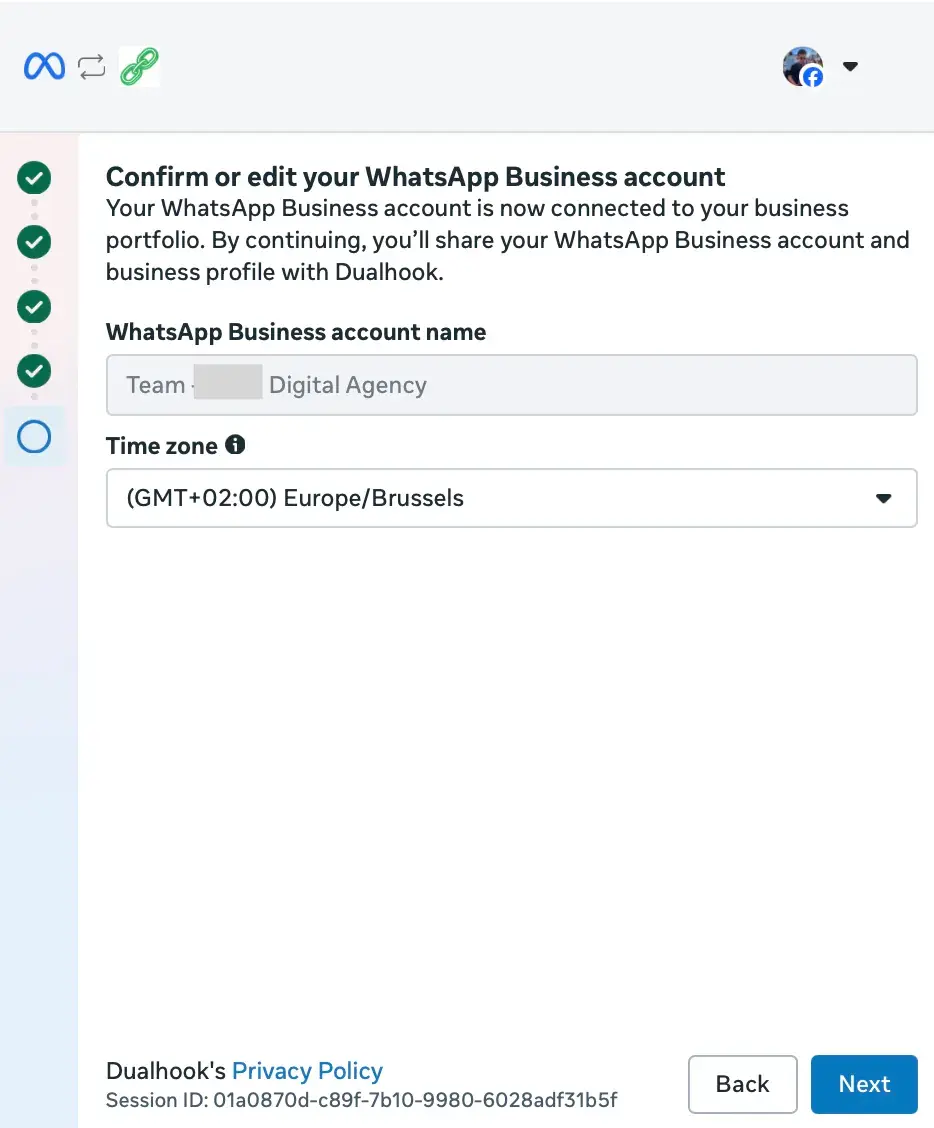
7. Confirm the WhatsApp Business Account and time zone: Check the WABA/account name and select the correct time zone. Some account names are read-only on this screen because the name is taken from the connected app profile.
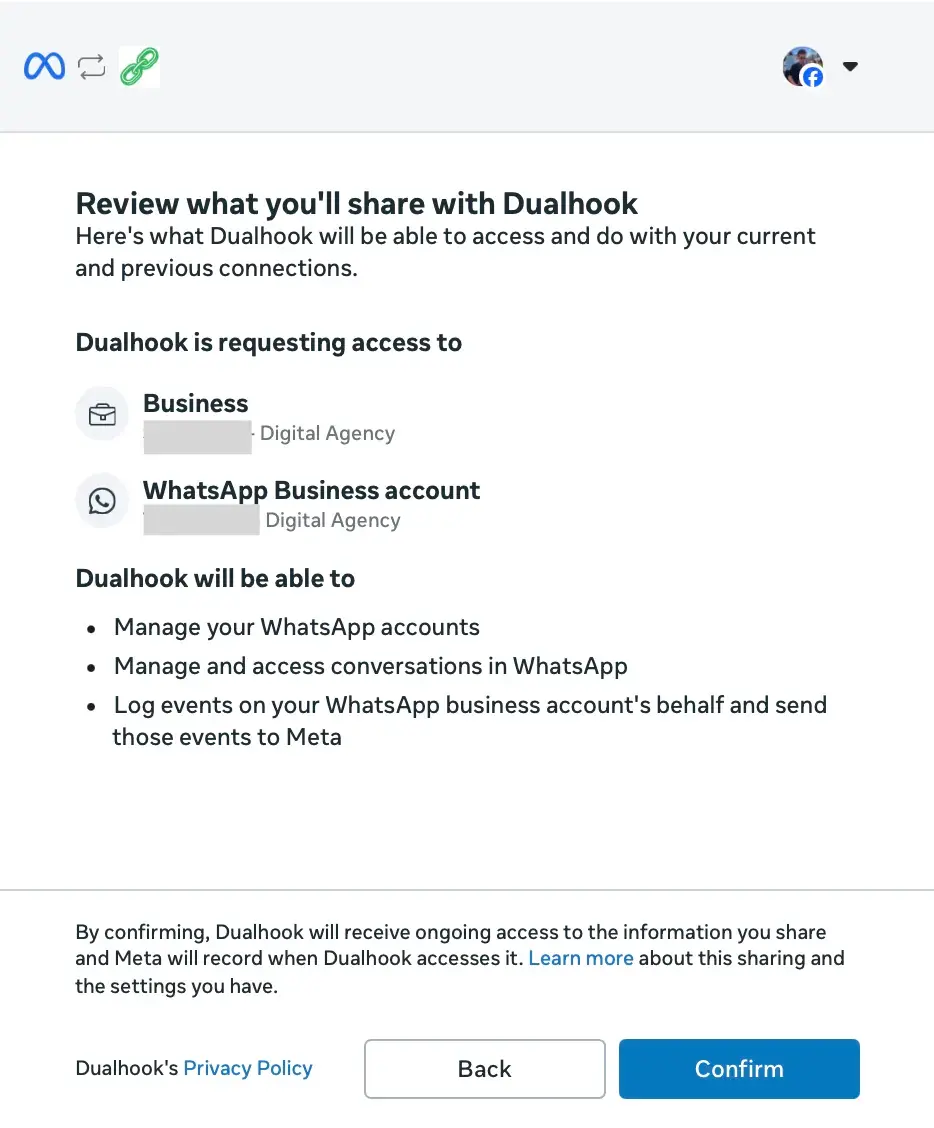
8. Review and confirm the sharing permissions: Check that the business portfolio and WABA belong to the intended business, then click Confirm.
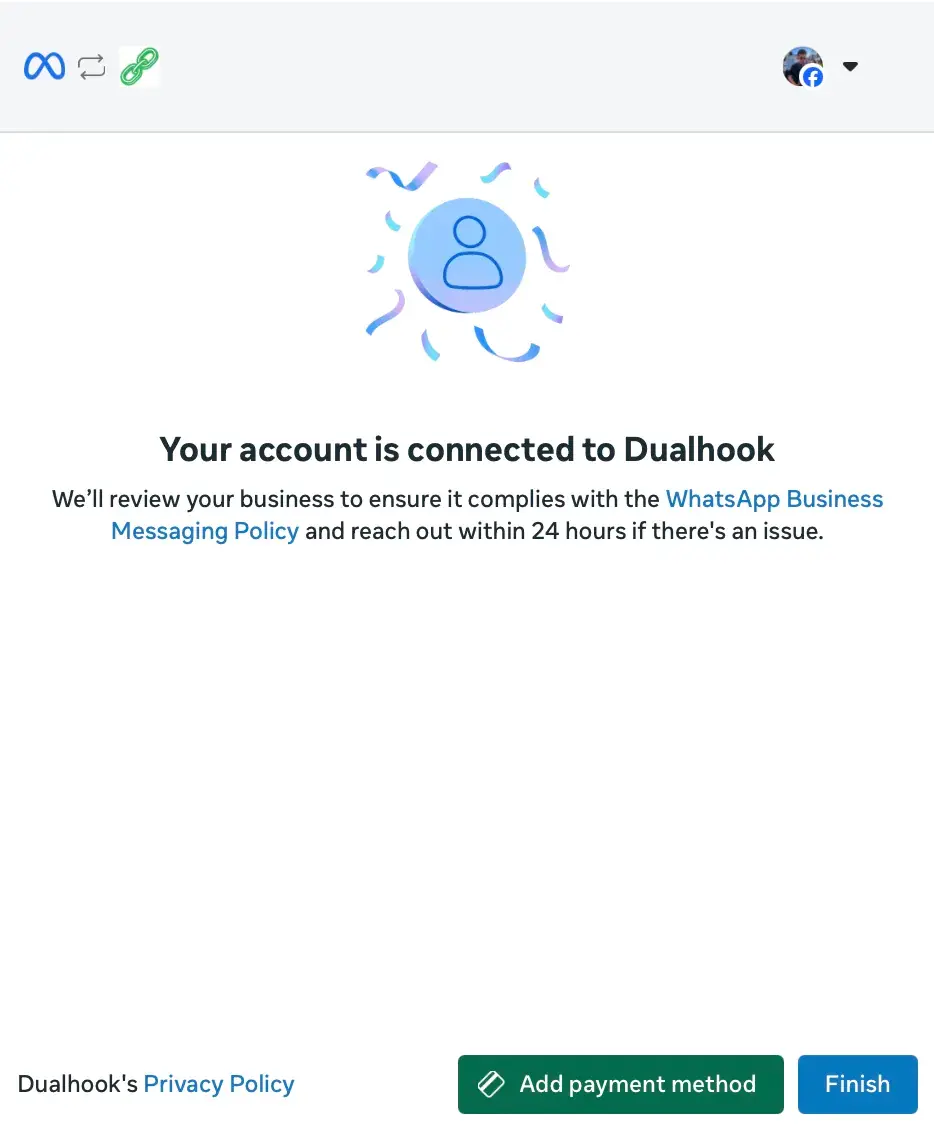
9. Wait for completion and click Finish: Keep the pop-up open while Meta connects the account. On the success screen, click Finish to return to the GetGabs app in Shopify.
Path A — If this is a fresh/API-only number
1. Start from your Shopify app: Open the GetGabs app from your Shopify admin. On the onboarding checklist (“Setup guide”), under Connect your WhatsApp Business account, click Connect with Meta for Business.
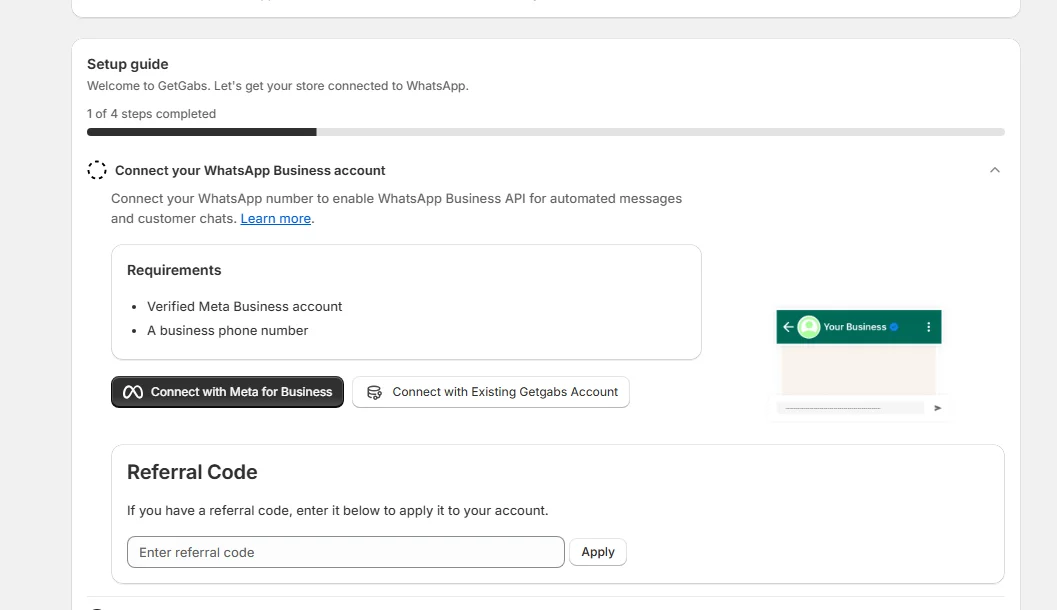
2. Apply for WhatsApp Business API: A GetGabs dialog opens explaining the requirements — a registered business and a working website — and completing Facebook Business Manager verification to increase your WhatsApp messaging limit. Choose Login with Facebook to connect a new Facebook/Meta account, or Merge Existing Facebook Account if you already manage a connected Meta Business. A Meta pop-up should open. Keep the Shopify admin tab open until the flow finishes.
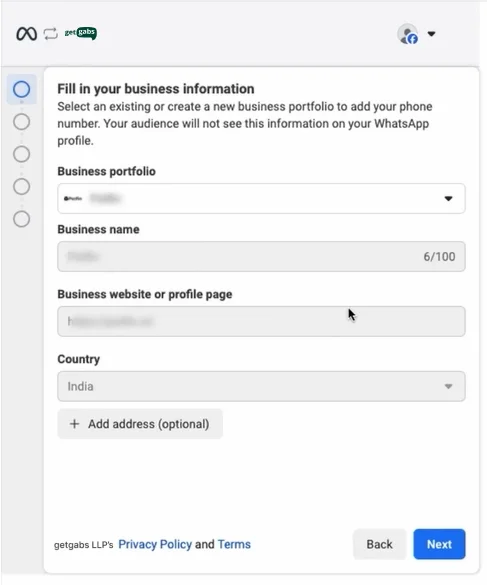
3. Fill in your business information: Select an existing Business Portfolio or create a new one, then enter your Business name, Business website or profile page, and Country. Click Next.
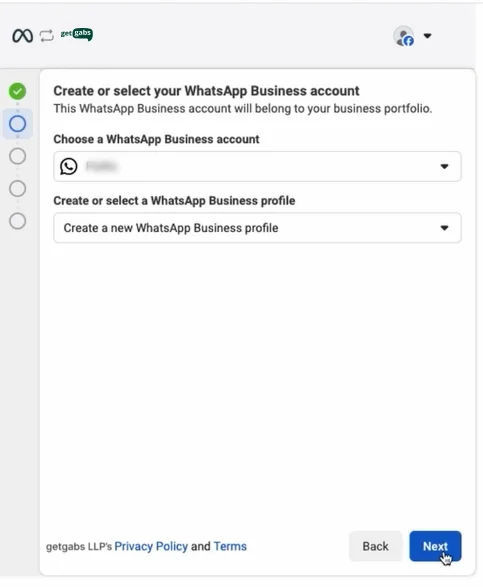
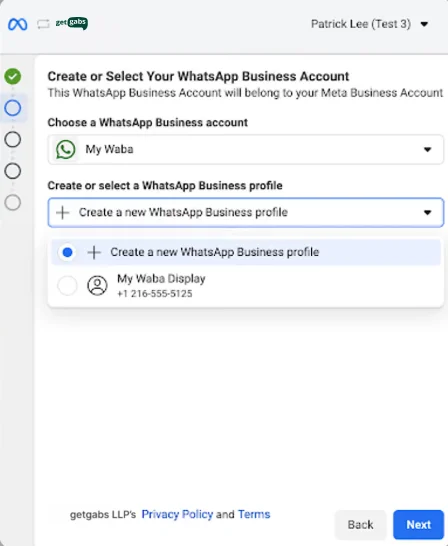
4. Create or select your WhatsApp Business Account: Choose an existing WhatsApp Business Account from the dropdown if you have one, or leave the default option to create a new one. Under Create or select a WhatsApp Business profile, choose an existing profile or create a new one. Click Next.
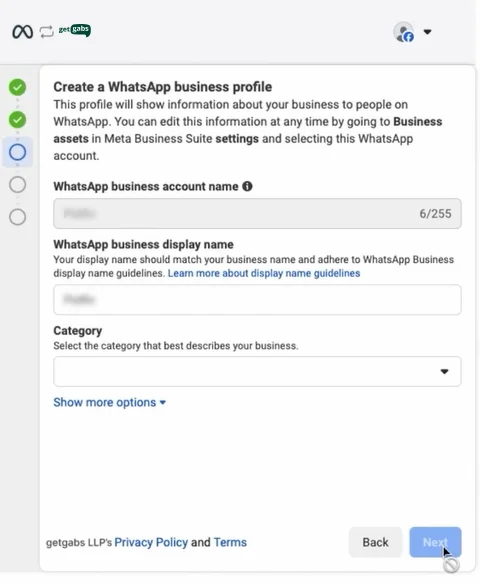
5. Create a WhatsApp Business profile: Enter the WhatsApp business account name, the WhatsApp business display name (it should match your business name and follow WhatsApp’s display name guidelines), and select a Category. Click Next.
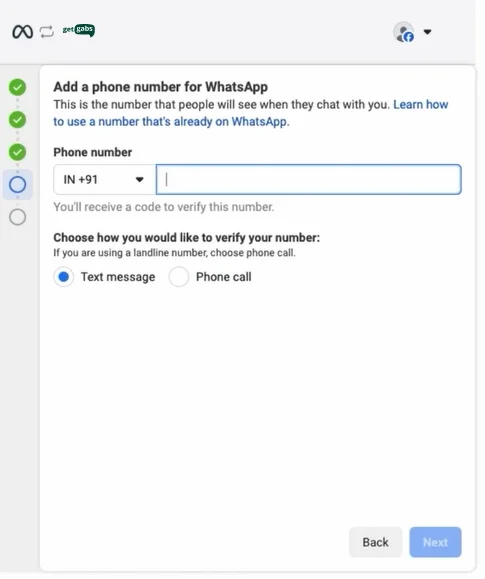
6. Add a phone number for WhatsApp: Enter the phone number you want to connect and choose how you want to verify it — text message or phone call. Use phone call only for landline numbers. Click Next.
7. Verify your phone number: Enter the 6-digit verification code sent to that number. Do not share the verification code or your WhatsApp two-step verification PIN with anyone, including support. If it doesn’t arrive, wait for the on-screen timer to request a new one.
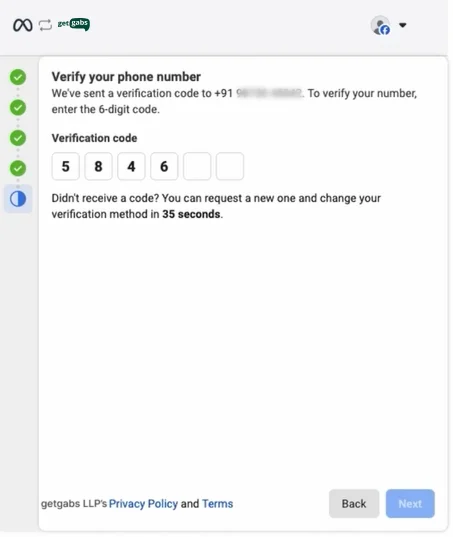
8. Review the permissions, confirm the details, and click Finish: Wait for Meta’s success state, then return to the GetGabs app in Shopify and wait for the onboarding checklist to complete the connection.
If you intended Coexistence – If the phone number is currently active in the WhatsApp Business App but Meta starts asking for an SMS/voice registration code instead of showing the app-profile/Coexistence route, stop before submitting the code. Go back once, verify the country code and number, and try again only if the screen was entered incorrectly. If the code route remains, take screenshots and contact GetGabs support. Do not delete the WhatsApp Business App account or disconnect assets as a troubleshooting shortcut.
After signup
- Coexistence: the WhatsApp Business App remains usable on the phone, and the number is connected to the WhatsApp Business Platform/GetGabs. The Meta flow normally includes a business-app profile confirmation and an app-side connection/QR step.
- API-only: the phone ownership verification is completed, and Meta reported the new API connection. The standard API-only route is not the same as app+API Coexistence.
- Approval status: a successful connection does not, by itself, mean that Meta has approved the display name or completed business verification. Check the relevant status in WhatsApp Manager/Meta Business Suite separately.



